Surgical Injury Part II: Ureters and Bowels

Bowel Injuries - Enterotomies and Colotomies

  • Tips for Prevention

    • Surgical technique is crucial in preventing bowel injury.

    • Adhesions can hide the bowel quite well!

      • Entering peritoneum – bowel loop adhered to anterior abdominal wall – very common scenario for injury.

      • Endometriosis – leads to scarring and adhesions, or bowel may be directly impacted and injury may occur with excision.

    • When breaking down adhesions:

      • Gentle, controlled traction and countertraction on bowel loops.

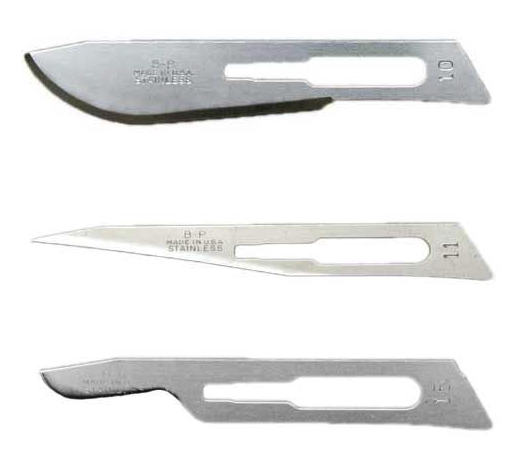
      • Sharp, cold dissection is preferred – typically Metzenbaum scissors or scalpel.

        • Blunt dissection may cause the bowel to tear.

        • Gentle, blunt dissection may be useful for some translucent adhesions – rub your thumb and index finger back and forth over the tissue to loosen it up, then switch back to sharp dissection once the adhesion “window” can be seen.

      • This can be a long process in some surgeries! Patience is key. Don’t be afraid to move to another area if you’re not making progress in one spot.

  • “Running the Bowel”

    • You’ve probably heard of this before… but how do you do it, exactly?

    • Most of the time, we’re talking about small intestine:

      • Start at the Ligament of Treitz. 

        • This band of tissue extends from the diaphragm to the duodenojejunal flexure - so up high (close to T12) and posteriorly (remember the duodenum is largely retroperitoneal).

      • Hand over hand, move down the bowel, inspecting for injury or perforation.

        • You’ll start in the jejunum, and move to the ileum of small intestine.

          • There’s no landmark to distinguish these two, but the ileum feels thinner and the lumen is somewhat smaller.

      • For small intestine, you end your run at the ileocolic junction.

        • This is denoted by the appendix! 

      • Large intestine is distinguished by epiploic appendages, outpouchings of the colonic wall (haustrae), and three large muscular bands (taenia coli). 

        • Should also be inspected for injury if suspected!

  • Site and extent of injury

    • Technique

      • Critically important – repair to bowel injuries are done perpendicular to the long axis of the bowel.

        • I.e., if you are looking at bowel in your hand going right-to-left, your repair is up-and-down.

          • If you repair parallel to the long axis of the bowel, the bowel lumen will narrow and potentially cause obstruction.

Operative obstetrics and gynecology - Correct technique for bowel repair

    • Serosal injuries: 

      • If underlying muscle and mucosa are intact and the serosal injury is small, then this can be left unrepaired – stitching may just increase complications.

      • If muscle is torn as well, then repair should be performed as the muscle provides integrity – the bowel wall may perforate without overlying muscle.

        • Small, tapered needle with 3-0 or 4-0 silk.

        • Avoid placing the stitch through the mucosa and into bowel lumen!

    • Perforating injuries:

      • Ideally they are repaired immediately to limit contamination of the peritoneal cavity!  

      • Antibiotics should be given to cover anaerobic intestinal flora, if they haven’t already:

        • Typically a dose of metronidazole

      • Smaller perforations can typically be closed in a two-layer fashion:

        • Inner layer of absorbable, braided suture (i.e., 3-0 Vicryl or Polysorb) that goes through the full thickness of the bowel.

          • Need to ensure mucosal approximation for a water tight seal!

        • Outer layer is the seromuscular repair as we described before, with 3-0 or 4-0 silk. 

      • Larger perforations may require bowel resection and reanastamsois.

        • Should be considered if perforation:

          • Involves more than 50% of bowel wall circumference

          • There are multiple perforations within a short segment of bowel

          • There is vascular compromise to a segment of bowel

            • If you see the serosa appears dark and dusky and fails to pink up after a few minutes… likely needs resection.

        • This is generally beyond the skillset of a generalist OB/GYN - so call your general surgery or colorectal surgery friends to help with these.

      • Regardless of size, irrigation should be performed copiously to clear out intestinal spillage, particularly if there was a colotomy.

        • Surgery may advise placement of a Jackson-Pratt (JP) drain with spillage occurring, to monitor for leaks at site of bowel reanastamosis – this is less and less common as better evidence has emerged that drains don’t alter outcomes.

        • We are definitely not the experts here – defer to surgical colleagues on indications and necessity of drains!

    • Management after Injury/Repair

      • Timing of feeding after bowel injury and repair is also controversial.

        • However, most recent evidence in colorectal surgery suggests that early enteral (PO) feeding is feasible and safe, with early frequently defined as within 24 hours of surgery. 

          • Small injuries that are within the purview of OB/GYNs to repair do not need to have feeding restrictions.

          • Larger injuries where you’re obtaining consultation for sure – defer to your surgical colleagues.

      • Ongoing antibiotic therapy and postoperative imaging studies are generally not warranted.


Ureteral Injuries

  • Prevention

    • Knowing your anatomy is really important, as the ureter runs in some high-risk areas:

      • At the pelvic brim, where it crosses the bifurcation of the common iliac artery – injury can occur with hypogastric artery ligation.

      • In the pelvis, just below the infundibulopelvic ligament – can be injured with oophorectomy.

      • Beneath the uterine artery – often coursing laterally within 1.5 - 2cm – site of injury often in cesarean, if it occurs, and of course at hysterectomy.

      • From there it courses medially and ventrally, around the cardinal ligaments to enter the trigone – also a high risk point of injury at hysterectomy, as well as in urogynecologic surgeries like anterior colporrhaphy and uterosacral ligament suspension.

    • Risk goes up with more complex surgeries – be particularly aware with:

      • Malignancy

      • Large fibroids

      • Adhesive disease and PID

      • Placenta accreta and cesarean hysterectomy generally

      • Vaginal hysterectomy with significant prolapse

      • Congenital anomalies

    • Do preoperative stents help?

      • They may be helpful for identification of ureters and dissecting around them, however, there’s no evidence to say they reduce the risk of injury.

        • They may help you identify it once it happened, though!

      • Consider them on a case-by-case basis with high risk procedures.

  • Detection

    • Intraoperative detection is so much better than delayed injury.

      • Injuries can cause transection which is easily detected, but also be aware that injuries may be delayed particularly with thermal injury, crush injuries, or overly aggressive dissection leading to devascularization.

    • Dye solutions (indigo carmine, methylene blue, fluorescein) provided intraoperatively can allow you to see:

      • Extravasation of dye in the surgical field – an abdominal transection injury

      • Failure to see ureteral efflux on cystoscopy – more likely a crush injury, or a kink from a suture.

    • Cystoscopy is very helpful:

      • You want to see brisk efflux – wisps of dye passage may suggest partial occlusion or kinking.

      • Stents can be passed if you’re qualified, or by urologic consult. 

        • If stents pass easily and dyed urine drips from a stent, it’s likely that ureter of concern is kinked somewhere – review, release suture, and cystoscope again to see if that causes improvement.

        • If stents cannot pass more than a few centimeters, ligation or transection likely occurred.

          • Dye can be passed through a stent retrograde as well to aid in visualization in the abdomen of an injury site.

    • Unfortunately, 50-70% of ureteral injuries are not diagnosed in the acute setting.

      • Delayed recognition of injury manifests as flank / abdominal pain, anuria, urinary ascites, and concern of course for fistula development (copious discharge from wound and/or vagina). 

      • If suspected postop, workup is usually through CT scan (IV pyelogram - preferred) or a retrograde pyelogram.

  • Repair techniques (a brief review, as if an injury occurs this will be done by consultant, typically):

    • Depends largely on the site and mechanism of injury.

    • Stents: may be needed alone for some crush injuries or other ‘minor’ damage.

      • Some small laceration injuries (<50% diameter of the ureter) can be primarily sewn over a stent.

      • If over 50%, requires anastomosis or reimplantation. 

    • Ureteroneocystotomy: the ureter is reimplanted into a deliberate cystotomy site. 

      • Typically for distal injuries.

      • Modifications if additional mobilization is needed include:

        • Elongation of the bladder

        • Psoas hitch: a technique where the bladder is hitched up onto the psoas muscle to bring it closer to the ureter.

    • Ureteroureterostomy: can be:

      • Ipsilateral – the two cut ends are brought back together. Most common.

      • Transureteroureterostomy (contralateral) - essentially connecting the ureter to the other side, creating a “Y-shaped” drainage. For more complex repairs that are more proximal. Not common.

    • Boari flap: similar in principle to a psoas hitch, but a lot more extensive – the bladder is essentially turned into a tube to allow for greater reach for more proximal injuries.

  • Postoperative management:

    • Guided by urology – stent needs to be left in place for healing for a while, usually 2-6 weeks.

      • If cystotomy as well, a Foley catheter would also be left.

    • Retrograde pyelogram can be performed at time of stent removal to demonstrate healed tissue without leaking or stenosis, and patients should be followed by urology postoperatively.  

Surgical Injury, Part I: Bladder Injuries

Oh no…

  • Surgical injuries happen in OB/GYN. As you’ve probably shared in your surgical informed consent discussion previously, we often talk about risks like:

    • Bleeding

    • Infection

    • Damage to surrounding structures.

  • The “surrounding structures” are typically:

    • Bladder

      • Most common injury

      • ~0.3% of cesarean deliveries; ~1% of major GYN surgery

    • Bowel

      • Less than 1% of GYN surgeries

    • Ureters

      • About 0.5% of GYN surgeries

  • The best prevention for injury is preparation - know your anatomy!

What are risk factors to intraoperative injury?

  • Anything that increases surgical complexity, essentially!

    • More extensive “bigger” surgeries - hysterectomy in particular

    • Obesity

    • Age or chronic medical conditions that might limit exposure

      • Particularly in laparoscopy (i.e., less distension ability)

    • Emergent surgeries - more frequent bladder injuries in STAT cesareans, 2nd stage arrests

    • Adhesive disease from prior surgeries, infections, trauma, etc.

    • Patients with congenital or acquired anatomic differences

    • Oncology - invasive disease and altered vasculature/structures 

What should I do when I identify something that is / may be injured?

  • If safe to do so: pause and evaluate

  • Call for assistance: senior colleagues, consultants as needed

  • If awaiting assistance but need to move on (i.e., bleeding accreta case) – can use “tagging suture” to mark area of concern

    • Bladder / bowel: place a small, brightly-colored suture (i.e., dyed 2-0 or 3-0 Polysorb/Vicryl) and leave a long tail at the suspected site of injury, so it’s easy to find later on.

  • Try to identify the mechanism and extent of an injury:

    • Is it just a serosal tear, or was mucosa exposed?

    • Were any contaminated (i.e., gastric / intestinal) contents spilled?

    • Cold cut, or is there potential for thermal (and thus more expansive) injury?

Do I have to deal with this? Can’t I just leave some things unrepaired, and it’ll heal on its own?

  • In some cases of bladder and bowel injury, very small, non-thermal injuries can be left unrepaired:

    • Verees needle “clean poke” of small intestine or bladder

  • However, failure to recognize injury or leaving an injury that is too large or going to expand due to thermal damage unrepaired risks complications:

    • Early

      • Copious wound drainage

      • Abdominal pain - urinary ascites

      • Fever

      • Ileus

      • Peritonitis

        • Have a high index of suspicion in the postoperative period for a patient having an unrecognized injury, especially if they’re having lots of drainage from the incision or a lot of unexpected pain!

    • Delayed

      • Recurrent urinary tract infection

      • Urinary incontinence 

      • Pelvic pain

      • Fistula formation

        • This is of course a major dreaded complication of unrecognized injury.

        • Quick detour – why can cystotomies occurring in TVT procedures stay unrepaired?

          • These injuries occur extraperitoneally in the retropubic space. 

            • Simple extraperitoneal injuries almost always heal on their own and can usually just be managed with catheter drainage & won’t form fistula

          • Injury occurring intraperitoneally should be repaired and are at risk for fistula formation.

            • We’ve provided the two “windows” of injury for fistulas to form at the time of a hysterectomy with the opening to the vagina:

              • Vesico-vaginal (bladder-to-vagina, at hysterectomy)

              • Uretero-vaginal (ureter-to-vagina, at hysterectomy)

              • Entero-vaginal (bowel-to-vagina)

Bladder Injuries

  • Site and extent of injury

    • Most commonly, injuries occur to the dome of the bladder - makes sense anatomically.

    • Rarely, injuries can occur lower, into the trigone or base of the bladder - this is a danger zone for ureteral injury as well.

      • Always evaluate the extent of the injury - if limited to the dome, repair is usually possible without consultative assistance. If more extensive or unsure, urology should be notified.

    • You can use your cystotomy to look into the bladder and see relative anatomy – 

      • ie, visualize the foley, visualize the ureteral openings from above.

      • If you’re within the dome vs the trigone

        • If you’re within just a few centimeters of the ureteral openings… may be worth having a consult come by for repair assistance!

  • Technique of repair for dome injuries

    • Two layers with absorbable suture – typically use a 2-0 or 3-0.

      • Don’t use non-absorbable or very delayed absorbable – there will be suture material in the bladder, which acts as a nidus for infection.

      • First layer: mucosal closure, in a simple running fashion (but not locking).

      • Second layer: imbricating layer over serosa/muscularis, not entering mucosa (to limit amount of material in bladder).

    • After repair, check integrity of the bladder repair while you still have access to the abdomen:

      • A variety of materials can be used to backfill, but generally you want something that is going to have color so you can see a leak, if it’s present.

        • Sterile milk/formula – works! Though can make your cystoscopy quite cloudy later.

        • Crystalloid with methylene blue/indigo carmine/fluorescein added.

    • Many folks may choose to perform cystoscopy at the same time or after backfilling.

      • The cystoscopy is more for checking your ureteral patency – you’ll have a hard time determining bladder repair integrity from a cystoscopy view unless there’s a large defect.

        • That said, if your injury was in the dome and far away from ureters, and you could see the ureters from above, cystoscopy may not totally be necessary - as they’re unlikely to get kinked in your repair. 

    • Postop, the Foley needs to stay in place usually 7-14 days.

      • A void trial and a voiding cystogram should be performed to again demonstrate bladder repair integrity.

  • Technique of repair for trigone injuries

    • You should call urology / urogynecology for these.

    • You will need to assess the status of the ureters, as the ureteral orifices coming into the trigone may be damaged.

      • IV methylene blue, indigo carmine, or fluorescein along with small dose of furosemide.

        • If you see dye entering the bladder but not entering the retroperitoneal or intraabdominal space - likely no ureter injury.

      • Urologists on consultation with a trigone injury may go ahead and place stents to evaluate the ureters.

        • Placing the stents (and the relative ease or not of doing so) may help them to triage where a ureteral injury is at, and then with repairing the injury ensure the ureter is not incorporated.

        • Stents may remain in place postoperatively to keep ureters patent, as nearby tissue may swell and obstruct them otherwise.

Surgery: Postpartum Sterilization Techniques

What is a postpartum tubal? 

  • Procedure done after birth of a baby to permanently prevent future pregnancy 

  • Reason for performing it postpartum:

    • Usually done within 1-2 days after vaginal delivery 

    • Highly effective: risk of pregnancy is <1% (though if you want to look at the actual rates depending on type of surgery, please check out the CREST study!

    • Increased access: patients are already in the healthcare setting after delivery of their baby; don’t have to come back to the hospital/healthcare setting for a different procedure

    • Mostly minimally invasive: not laparoscopy, but can be done through a single, mini-lap incision below the belly button as the fundus of the uterus is still high 

Today we will focus on the surgical steps 

  • For pictures, we still like Atlas of Pelvic Surgery:

  • Pre-operative 

    • Surgical consent 

      • Review the way the procedure is done and discuss the different methods that you can provide.

      • Discuss the risks, benefits, and alternatives

        • Benefits: stated above, quick recovery usually 

        • Risks: as with all surgeries, there are risks of bleeding, infection, injury to organs around the uterus and fallopian tubes 

          • Another big risk I tell people: we can’t perform the surgery that they want after delivery 

          • A few major reasons: significant anemia after delivery, infection (ie. chorio/endometritis), inability to palpate the fundus after delivery 

            • Can also be an issue for patients with increased central adiposity 

          • Lastly, it is possible that we enter the abdomen but cannot perform the surgery because we can’t find the tubes, usually due to adhesions 

        • Alternatives: no sterilization procedure or use a different form of birth control until 6 weeks postpartum for a laparoscopic procedure 

        • MA-31 - 30 day consent! For those with state insurance

    • Preoperative work up 

      • History: 

        • Ask specifically about history of abdominal surgeries and pelvic infections (ie. Chlamydia/Gonorrhea) 

        • This can help determine if there will be significant intrabdominal adhesions that may prevent surgery 

        • Not a strict contraindication for surgery, but should go into counseling of patients 

      • Physical 

        • Palpation day of surgery of the fundus 

        • Can decide to proceed or not if fundus is easily palpable 

      • No additional work up usually beyond prenatal care and delivery 

      • Sometimes, if there is significant blood loss with delivery, providers may want to get a CBC 

      • Usually, will have a type and screen on file already as patients are admitted for delivery (but should have this definitely)

    • Anesthesia 

      • Most procedures are done with neuraxial anesthesia 

      • Sometimes, patients can keep their epidural from labor/birth 

      • However, some patients may not want another epidural/spinal 

    • Expectations 

      • Patient will not need to necessarily stay longer than for delivery 

      • May need a small amount of narcotic medication for incisional pain, but usually, I do not prescribe more than 5 tabs of 5 mg oxycodone, and only if needed 

  • During the surgery 

    • Adequate anesthesia and prepped and draped 

    • Positioning: 

      • Dorsal supine 

      • Though during surgery, we can ask the anesthesiologist to airplane the patient to the left or right in order for the uterus to fall to one way or the other and bring the fimbria of the tube into view 

    • Surgical steps 

      • After prepping the abdomen, mark approximately 3-4 cm on the inferior edge of the umbilicus 

      • Some people will inject 1% lidocaine at this time, but I find that it distorts the anatomy 

      • Incise along edge and continue downward dissection until the fascia is reached. Can use Army-Navy or other retractors to hold back the skin 

      • Pick up the fascia with either Kelly, Kocher, or Allis and make a small incision with the Metzenbaum scissors after ensuring no bowel is adhered to the fascia 

      • Incise the fascia after protecting with a finger, and place a Kocher on either end. Some people will also throw a stitch on either end with an 0-vicryl and hold these with hemostats to be able to find your fascia later 

      • Retract the fascia (again, can use army-navies or some people like the small Alexis-O retractor) and pop into peritoneum, then use a finger to feel for the cornua and tube 

      • Can airplane the patient right or left for either tube 

      • Once the tube is found, use a Babcock to hold it up and follow it out to the fimbria. Make sure it is a tube and not a round ligament! 

      • Salpingectomy

        • Use a Ligasure to clamp, seal, and cut the tube along the mesosalpinx 

        • Make sure to hug the tube 

        • Clamp, seal, and cut where the tube meets the cornua to remove the tube 

        • Inspect area of sealing and cutting to ensure no bleeding 

        • Allow the tube to fall back into the abdomen, and proceed with the next tube 

        • If you don’t have a Ligasure, can use a kelly clamp to clamp along the mesosalpinx below the tube. Cut above the Kelly clamp until the end of the clamp is reached 

        • Use a 3-0 synthetic absorbable suture and take a bite with the needle just beneath the level of the clamp and tie this portion down 

        • Do this several more times until the cornua is reached 

        • Use the Kelly clamp to clamp off the end of the tube, cut off the tube, and again, use the 3-0 synthetic absorbable suture to ligate the end of the tube 

        • Send tube to pathology for confirmation of cross section

      • Pomeroy Technique

        • Place the babcock in the middle of the tube so that a small, 1-2 cm portion of tube is elevated 

        • Tie a 3-0 synthetic absorbable around the base of this elevated section. Can tie two for a modified pomeroy 

        • Hold the suture with a hemostat and then excise the knuckle of tube for pathologic confirmation 

        • Use the hemostat to keep the tube out of the abdomen to inspect the area that you have incised for any bleeding. Use a bovie to coagulate any areas of bleeding

        • Once the area is dry, can take off the hemostat and let the tube drop back into the abdomen 

  • Parkland technique

    • Place the babcock in the middle of the tube so that a small, 1-2 cm portion of tube is elevated 

    • Using the Metzenbaum scissors, incise a small, avascular portion of the mesosalpinx beneath the babcock 

    • Pass two ligatures of 3-0 synthetic absorbable suture through the area that was incised and tie down on either end of the tube

  • Hold one end with a hemostat 

  • Use the scissors to incise the knuckle of tube above the ligatures and send to pathology 

  • Inspect the incised portions and ensure no bleeding

  • Allow the tube to fall back into the abdomen 

  • Once you have completed both sides and achieved hemostasis, close the fascia with 0-Vicryl or similar suture 

  • Then close the skin with 4-0 Biosyn/Monocryl 

  • Can inject lidocaine at this time if desired 

  • Bandage the area with small pressure dressing 

  • Post operative 

    • Spinal/epidural should wear off before going to postpartum unit 

      • Can breastfeed immediately if desired 

    • Routine postpartum in the hospital, with small amount of narcotics if needed

    • Remove dressing in 24 hours  

    • Follow up for routine postpartum care 


Surgical Essentials: Scalpel Blades and Handles

Embed Block
Add an embed URL or code. Learn more

It’s been a while since we did a surgically-focused episode - we’ve previously done a series on laparoscopy and hysteroscopy, as well as on sutures and needles. Today, let’s focus in on an essential surgical instrument - the scalpel!

Additional reading: British Journal of Surgery Oct. 2022 review (also, the author Dr. Ron Barbosa is on Twitter and does some great surgical tweetorials!) 

History of the modern scalpel

  • Morgan Parker, a 22 year old engineer at the time, patented a locking scalpel handle and blade system in 1915 to replace what previously were often single-piece instruments without a replaceable blade.

    • His original design (slightly modified) is still what we use today!

  • Parker initially numbered handles 1-9 and blades 10-20; while this has been somewhat modified/expanded, the nomenclature largely remains the same.

    • We’ll talk about the most common handles and blade types today.

Scalpel handles

  • You’ve probably never had to ask for these in a surgical tray – so let’s review!

  • The number three handle is most commonly used in surgical specialties:

    • Flat shape

    • Some serrations near the blade attachment area to provide better grip for surgeon

    • Fits blade numbers 10-19

    • Modifications include the 3L (long-handle scalpel) and 3L angled (long-handle with a slight angulation).

  • The number four handle fits larger blades (#20 and above), but otherwise is very similar to the #3. 

  • The number seven handle is very narrow and meant for precise, fine work – not typically used in OB/GYN or subsepcialties – more common in head/neck/ENT, plastics, neurosurgery, and dentistry.

Barbosa, BJS, 10/2022

Scalpel blades

  • You may be more familiar with these, but likewise may not have had to ask for them before!

  • The number ten blade is used to make longer skin incisions for laparotomy, or for shorter cuts where a wide blade is ideal (i.e., hysterotomy). 

    • This is probably what you’re most familiar with in OB/GYN applications. 

    • You may also encounter a number 22 blade, which is essentially a larger version of the #10.

  • The number eleven blade is triangular, long, and has a sharp point with an edge on one side. 

    • Its shape is best suited for a stab incision - for instance, for laparoscopic port incisions, Bartholin’s gland cruciate incisions, and the like.

    • Its shape is not great though for excising anything - it’s really pointy!

  • The number fifteen has a small, curved cutting surface as well as a pointed tip.

    • You can use this for a stab incision at the point, and a more controlled incision for excising tissue with the curved portion.

    • Great for working in tight spaces versus a 10 blade for excision (i.e., oncology cases or urogyn cases – think about sharply cutting on your cardinal ligament bites – a 15 blade on a 3L handle is great for this!)

    • Also great for stab incisions, and many folks may prefer a 15 to an 11 blade for Bartholin’s or laparoscopy incisions.

10 blade (top), 11 blade (middle), 15 blade (bottom)

Scalpel blade materials, and disposables versus regular blade/handles

  • Disposables are great and often very available for outpatient procedures or for emergencies

  • The blades between disposable and regular blades are the same shape/size/nomenclature, so there’s no difference in that regard.

    • However, the regular blades tend to be a bit thicker on the back, non-cutting surface of the blade, which gives a bit more structure and may feel sturdier when cutting.

  • In terms of materials, the vast majority of scalpels we use will be made of carbon steel or stainless steel.

    • Steel blades can also have other compositions or coatings that can help with retaining sharpness and/or resisting rusting/corrosion.

  • Other materials used in modern blades include ceramic, titanium, diamond, sapphire, and obsidian.

    • Many of these - especially ceramic and obsidian - are extremely sharp, and can be chosen because they are non-magnetic – so for MRI-guided procedures, they are preferred. However, they are so sharp that they can be very dangerous in poorly trained hands - so we wouldn’t use these unless you have a great reason to do so! 

How do I hold a scalpel?

  • Intern struggle – and the truth is that it depends!!! 

    • For larger blades - i.e., a #10 blade or a #20 or above - the best grip is a “palmar” or “violin grip,” in which you have your index finger atop the handle, and use your other fingers to hold the body of the handle, with the back part of the handle under your palm.

      • This allows for precision with the long, wide cuts you would typically make with this blade.

    • For smaller, pointier blades – a #11 or #15 - the “pencil grip” is preferred.

      • This allows for precision with your “stab” incision or for those tight/deeper spaces. 

Barbosa, BJS 10/22: Palmar/”Violin” grip, for larger blades (#10, #20 and above)

Barbosa, BJS 10/22: Pencil grip, for smaller blades (#11, #15)

Principles of Electrosurgery, feat. Dr. Gary Frishman

Here’s the RoshReview Question of the Week:

A 45-year-old woman in the postoperative recovery unit develops dyspnea. Her serum sodium is 130 mEq/L. Which of the following was the most likely distending medium used during her hysteroscopic monopolar fibroid resection?

Check your answer and get a sweet deal on RoshReview at the links above!


Today we welcome Dr. Gary Frishman to the podcast. He is a clinical professor of obstetrics and gynecology at the Warren Alpert Medical School of Brown University, and has served in varying leadership capacities at Brown as a residency program director and in other organizations, such as for MIGS Fellowship at ABOG, and within ASRM, SRS, and AAGL. While we were residents at Brown, Dr. Frishman used to share his wisdom with us on electrosurgery and we have wanted to put this podcast together for a long time! It’s more than just cut and coag!

What is electrosurgery?

  • Delivery of radio frequency waves that heat up tissue, which then causes tissue desiccation.

    • Cautery: not a specific term for this!

    • Electrosurgery represents alternating current where the body is part of the conductive circuit.

      • Modulating the delivery of this electricity is how we can get differing tissue effects.

Monopolar and Bipolar

  • Bipolar: movement of electricity from one point to another direct point.

    • i.e., bipolar forceps, LigaSure device (has two ends)

    • More precise delivery of energy, less smoke.

  • Monopolar: movement of electricity from one point (in dispersive fashion) to a return point.

    • i.e., the “grounding pad” when you are using a Bovie / electrosurgical instrument.

      • Energy still goes through body, to a second electrode and back to the machine!

Modifying the Delivery of Energy

  • Waveforms:

    • Think about energy delivered as a garden hose with a spray nozzle at the end.

      • The amount of energy delivered is your watts setting on the machine (i.e., 35W).

        • This you can adjust linearly — you can go up to 40W, or down to 30W, but it’s a linear adjustment — less efficient.

      • If you adjust your spigot at the end of the nozzle, that is another way to adjust your energy delivery. Like if you get a dispersed spray (sprays all over the wall) versus a fine spray (that gives you a directed, straight line of water).

        • Cut: the directed, fine, straight line of water spray

        • Coag: the dispersed spray that goes everywhere

          • The energy is still our original 35W, it’s just differently applied!

      • Importantly, the cut and coag settings also are different in the time energy is applied.

        • Cut: energy is constantly applied — so, for example, 100W of energy delivered over 100 seconds.

          • Clinically, this delivers good cutting, but poor hemostasis.

        • Coag: energy is applied in bursts, and it’s only on 6% of the time — so 100W of energy delivered over 6 seconds.

          • It’s an uncontrolled, massive burst!

          • Clinically, this delivers a lot of lateral spread, and you get good hemostasis, but not great cutting.

        • Blend curve: tries to get you both: excellent cutting, excellent hemostasis, little thermal damage.

  • Spot size:

    • You can also adjust the spot size of energy delivery by changing the tip of delivery instrument (i.e., Bovie)

      • By flattening the tip, you make the spot size larger — much larger surface area to deliver energy across.

      • By using the fine point of the tip, your spot size is much smaller — delivers energy to more concentrated area (i.e., needle tip electrodes).

Complications of Electrosurgery

  • Direct coupling

    • Accidentally touch something metal with your electrosurgery device

      • i.e., touching a retractor or a laparoscope, which is in turn touching something else

      • Good news — just like with the “spot size,” if you touch a retractor, it’s such a large surface area it’s unlikely to cause damage. However, with smaller instruments, this can modify injury and cause injury.

        • Plastic trocars help prevent this in laparoscopic surgery.

  • Insulation failure

    • Tiny cracks in an instrument that can cause insulation to fail — as you might get inadvertent direct coupling from the device if electricity is leaking out through the insulation.

      • Fortunately this is very uncommon.

      • If there are gross breaks — don’t use the instrument.

      • Limit the use of coag (i.e., use cut exclusively) to prevent this kind of injury.

  • Capacitive coupling

    • Two conductors separated by an insulator

      • Energy is stored in the separated conductor, and can then deliver energy.

        • Less likely to occur with cut than coag

        • Jewelery and electrosurgery - a possible (though rare) complication of wearing jewelry in surgery.

Role of Tissue Resistance

  • Electricity heats up water in the cell

    • Cut: heats up water in the cell very rapidly, and it explodes.

    • Coag: heats up water in cell more slowly, and energy dissipates laterally.

  • Electricity follows path of least resistance

    • As tissue dessicates (water removed), it becomes harder for electricity to pass through.

    • Think about a car on cruise control, set to a speed of 30W:

      • If you’re going uphill, you’re going slower unless car adjusts — higher tissue resistance.

      • If you’re going downhill, you’re going faster unless car adjusts — lower tissue resistance.

  • Newer generators measure tissue resistance and can adjust your energy appropriately!

    • Newest bipolar instruments also take surgeon out of equation entirely — and automatically adjust energy to resistance and shut off automatically when resistance is so high energy can’t pass.'

  • Importantly, if you’re using monopolar — electricity will go around high-resistance areas! This is how you can get capacitive coupling to jewelry and other areas.

    • A “grounding pad” is usually very large to help accommodate for this and prevent this injury.

      • It’s also in two halves, and both must be connected to make the machine work.

      • Bipolar instruments reduce this risk significantly.

Fulguration

  • Taking the tip of the device and placing it close to, but not on the tissue — may have heard of this as “arcing” the device.

    • Use coag on this because you want a huge burst of energy to leap across the space.

    • This energy “follows the blood” back to the original bleeder.

Cutting on Skin??

  • You can! But you need to know how to deliver energy — need a small spot size and to use cut.